Hardwood Floor Care and Maintenance
Hardwood Floor Maintenance
A guide to maintaining your hardwood floor
Now that you have had your floors done, whether it be sanded and refinished or newly installed hardwood, maintenance and care are the next steps in keeping the floors as free of scratches and blemishes as possible. All hardwood floors scratch at some point. However, you can reduce the amount of scratching by following the steps below.
Hardwood flooring has the ability to last 100+ years. We have been in many homes built in the 1800s with its original hardwood that just needs a good sanding and refinishing. Here are a few need-to-know tips on how to keep your new hardwood floors looking beautiful for years to come:
Tip #1:
Take off your shoes:
Grit, dirt and debris are your hardwood floors’ new enemy. Tracking in any of these things from outside doorways or garage entrances into your home spell nothing but trouble for your floors fresh finish. Things like small pebbles or even salt from your driveway in the winter time that get lodged into a boot or sneaker can cause scuffs and scratches that may only be completely fixed with a screening and recoating of your floor.
We’d like to help you avoid this…
A great place to start is by placing mats by the doorways for your shoes. This will allow anyone coming in to wipe any dirt or debris off their shoes, (or even better) remove their shoes completely, especially in inclement weather. Mats should be cleaned regularly. The area where the mat is placed should be kept dry at all times.
Tip #2:
Sweep or vacuum regularly:
Keeping your hardwood floor as free from dirt and debris as possible is the goal in preventing unwanted scratches. Try to sweep or vacuum regularly; we recommend using a soft bristled broom or a microfiber dusting mop (like a Swiffer or Cedar microfiber cloth duster.) There are vacuums made for hardwood floors also, which are just fine; but remember to keep the vacuum wheels clean to prevent any scratching from them, and only use the flooring attachment meant for hardwood floors (they usually have a soft brush on the end).
Tip #3:
Forget about the old Mop and Bucket:
When it comes time to clean your hardwood floors, don’t even think about the old bucket filled with soapy water and big sponge mop! All that water will seep into the grooves and get absorbed causing your hardwood floor to buckle and need replacing. A well-wrung cloth mop made from terry-cloth or microfiber will hold enough of your cleaner to get the job done yet not enough to allow moisture to penetrate your hardwood floors.
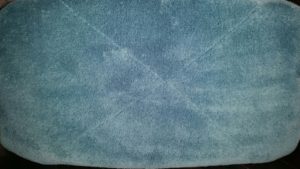
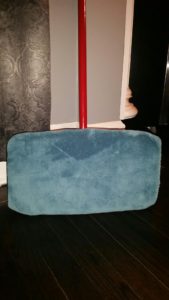
Microfiber Mop
Tip #4:
No harsh chemical cleaners:
Using a cleaner with harsh chemicals can slowly damage the finish on your hardwood floor. We do not recommend the use of any products containing chemicals like ammonia, vinegar, dish washing detergent, powdered all-purpose cleaner, Endust, Pledge, oil soap, or any type of wax or silicone based products on your floor. Also, try not to pour your cleaning product directly onto the hardwood floor. It may be tempting to create a puddle of cleaner and spread it out over your floor but this approach can have the same effect as using too much water when cleaning. Cleaning products that are applied too liberally in spots can absorb into wood, cause swelling, buckling, and an uneven look over time. There are a lot of great products out there that are even “Green.”
We find that the ammonia-free Window cleaner works great on just about any floor covering. It cleans beautifully, won’t harm your floors finish, and dries quickly enough eliminating the threat of standing water/moisture.
Tip #5:
Felt pads under furniture
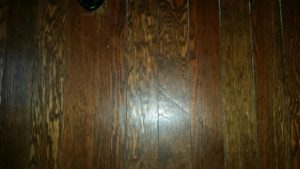
This is a point to stress. Any kind of furniture, when dragged across a hardwood floor, can damage its finish. Whether it’s a heavy piece or not, we always recommend using felt pads under all the furniture that’s going to be on top of your hardwood flooring. Over time, heavy furniture can leave indents in the hardwood, so even though you might not be moving that big heavy corner cabinet any time soon, the felt padding underneath will prevent any surprises left on your floor.
Tip #6
Blinds/Curtains
Prolonged sun exposure to your hardwood floors can discolor the wood. Placing blinds and curtains on your windows where direct sunlight comes in and onto the hardwood floors will take care of this.
Tip #7
Pets
Keep pet nails trimmed to avoid scratches. Food and water bowls should be kept on a mat. Remember to keep the mat as clean and dry as possible.
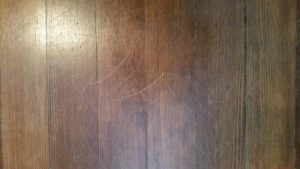
Douglas Fir Pine wood showing scratches from dog nails
Tip #8
Temperature/Humidity
It’s best to keep your home at a consistent temperature between 65-80 degrees. Drastic fluctuation in the temperature and humidity will cause the floors to expand and contract rapidly and that can induce gaps between the boards and/or buckling.
Tip #9
Area Rugs
Area rugs are a great accent piece with a purpose! Area rugs are great in rooms where smaller furniture pieces are moved frequently such as coffee/end tables and dining room chairs. A child’s bedroom/playroom is another great place for an area rug. Putting an area rug will help prevent scratches and scuffs from toys (not to mention it will reduce the amount of noise.)
Tip #10
Screen and Recoat your hardwood floors
This tip is for floors that were finished on site- whether is was a new unfinished installation or your existing floors were sanded and refinished. We recommend screen and recoats every few years. During the screen and recoat process, we take a thin layer of poly off and apply a new fresh layer. This is an important upkeep as it helps maintain the finish on your floors without having to do a full sanding and refinishing. Screen and recoats are typically a quick process and does not require the amount of time off your floors as a standard sanding and refinishing requires. Screen and recoats do not sand down to the raw hardwood. The stain is not affected during this process nor the integrity of the hardwood. Light surface scratches are usually fixed with a screen and recoat, however, deep penetrating scratches are not. If you do have some deep scratching, it may be time to refinish your hardwood. You can read more about the refinishing process here.
We hope these tips help in keeping your floor looking new and beautiful.

46 Comments
Pingback:
Pingback:
Pingback:
Pingback:
Pingback:
Pingback:
Pingback:
Pingback:
Pingback:
Pingback:
Pingback:
Pingback:
Pingback:
Pingback:
Pingback:
Pingback:
Pingback:
Pingback:
Pingback:
Pingback:
Pingback:
Pingback:
Pingback:
Pingback:
Pingback:
Pingback:
Pingback:
Pingback:
Pingback:
Pingback:
Pingback:
Pingback:
Pingback:
Pingback:
Pingback:
Pingback:
Pingback:
Pingback:
Pingback:
Pingback:
Pingback:
Pingback:
Pingback:
Pingback:
Pingback:
Pingback: